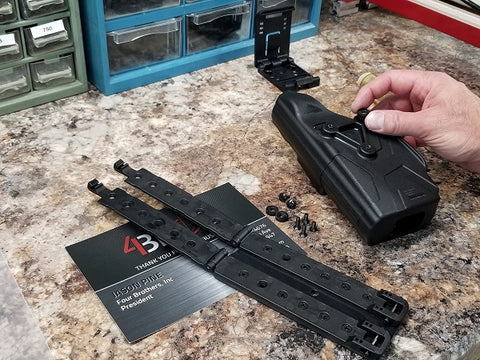
4Bros Molle Adapter Installation Instructions
Jason PineShare
Our Molle Adapter was designed and built after our local Law Enforcement friends suggested we create a better adapter over what they were currently using. The following instructions are intended to help you install the adapter to your Blackhawk or Blade-Tech holster on your own. If you need further guidance, please email us and we will help you as quickly as possible.
We have updated the design slightly since writing the instructions in 2019.
You will need a Phillips head screw driver, Blackhawk or Blade-Tech holster and removable thread locker for correct installation.
1. Remove existing belt attachment.

2. Remove contents from 4Bros Molle Adaptor bag. You will have 6 screws and three hard spacers with the adaptor itself. 
3. Spacers are only required for offsetting the adaptor from the holster to provide clearance for the threaded posts on the back of the adaptor. The X2 and X26 Taser holster (shown) do not require the spacers for proper installation. They may be used if you want the holster offset further from your Molle equipment. 
4. Once Spacers are installed (or not used), set holster on a flat surface and prepare to set Molle Adaptor in place. 
5. If Spacers are used, add the two longer flat head Phillips screws to the corresponding holes on the Molle Adaptor and start screws. If spacers are not used, install shorter flathead screws. Although not required, we suggest you run the screws in lightly to ensure everything is lined up and assembled correctly at this point. 
6. If Spacers are used, add the longer truss head Phillips screw to the corresponding hole in the center of Molle Adaptor and start screw. If spacers are not used, install shorter truss head screw. Although not required, we suggest you run the screw in lightly to ensure everything is lined up and assembled correctly at this point. 
7. Tighten screws to ensure adaptor is seated properly and secured to the holster correctly. The assembly should be solid. 
8. Once assembly is confirmed, we STRONLGLY suggest removing each screw individually and applying a small amount removable thread locker to the screws and reinstalling them tightly. The thread locker will help ensure the screws do not vibrate and loosen up in the field.
****WE FEEL THIS IS A CRITICAL STEP IN THE INSTALLATION PROCESS****
Our preferred brand is Loctite Thread Locker 243.

9. Final Assembly should allow Molle attachments to close and lock in place completely. If Adaptor is not installed correctly, Molle attachments may not lock or stay locked properly. We are not responsible for incorrect installation. We are ALWAYS available for installation guidance, please do not hesitate to reach out to us with questions.


