
Revision 3 Molle Adapter Install w/ Blackhawk Taser 7 & Taser 10
The following instructions are intended to help you install our Revision 3 Molle Adapter to your Blackhawk Taser 7 holster on your own. If you need further guidance, please email us and we will help you as quickly as possible.

You will need a Phillips Screw Driver, 1/8 Allen wrench, Blackhawk Taser 7 Holster and our Molle Adapter to complete the installation.

Remove the contents of the Molle Adapter Packaging

Remove the Blackhawk Taser 7 Holster from the package

Open the Blackhawk Belt Attachment and verify the screws match the above picture. Blackhawk has updated their holster to use 10-32 screws, where as the older models used 8-32 screws. (No worries, our adapter works with both)

Remove the original belt attachment and set it and the screws aside.

Set the 4Bros Molle Adapter on the holster with the threaded posts aligned with the chamfered holes on the adapter as shown

Grab the three 10-32 Flat Head Cap Screws from the Molle Adapter kit

Insert the 10-32 Flat Head Cap Screws in the chamfered holes and start the threads with the 1/8 Allen wrench as shown.

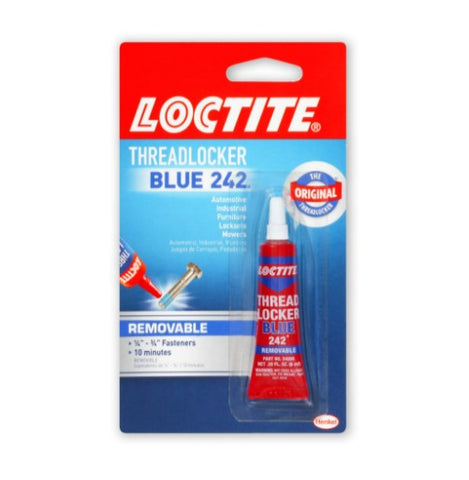
Tighten the 10-32 Flat Head Screws lightly until all three are inserted, then check fit. We recommend adding threadlocker to the screws one at a time after verifying fit at this stage. Removeable Loctite 242 threadlocker or Vibra-tite 121 are our preferred brands. Make sure the screws are good and tight before proceeding to the next step.

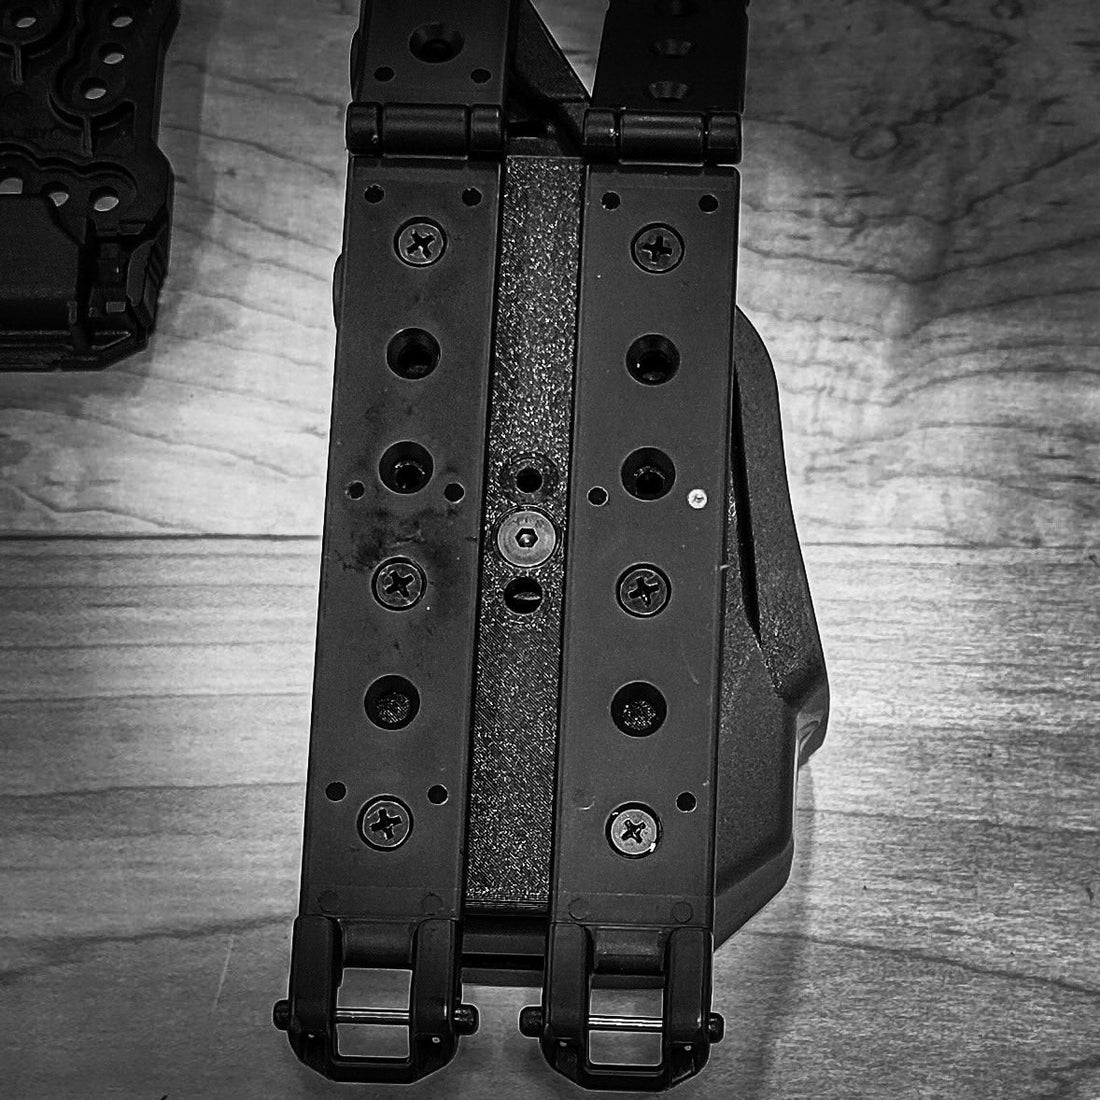
All three screw heads should be recessed from the surface of the adapter slightly. Please double check to make sure the correct screws have been used and they are tight.

Locate the 5/16 long 8-32 Flat Head Cap Screws and one Molle Attachment.

Align the top hole of the molle attachment with the top hole of the 4Bros Molle Adapter plate and start the 5/16 long 8-32 screw in the threaded post.

Tighten the top screw lightly with a screw driver. Do not overtighten the screw, you will come back to tighten them in a few steps.

Add two more 5/16" long 8-32 Flat Head Cap Screws to the Molle Attachment as shown and tighten the screws lightly.

Repeat the installation of the screws to the second adapter as shown. After the fit of each Molle attachment has been verified, remove each screw one at a time and add removeable Loctite threadlocker to each screw.

Congratulations, you have successfully installed the Molle Adapter. Please double check your screws frequently to make sure they remain tight and your gear is secured.
We are not responsible for incorrect installation. We are ALWAYS available for installation guidance, please do not hesitate to reach out to us with questions.